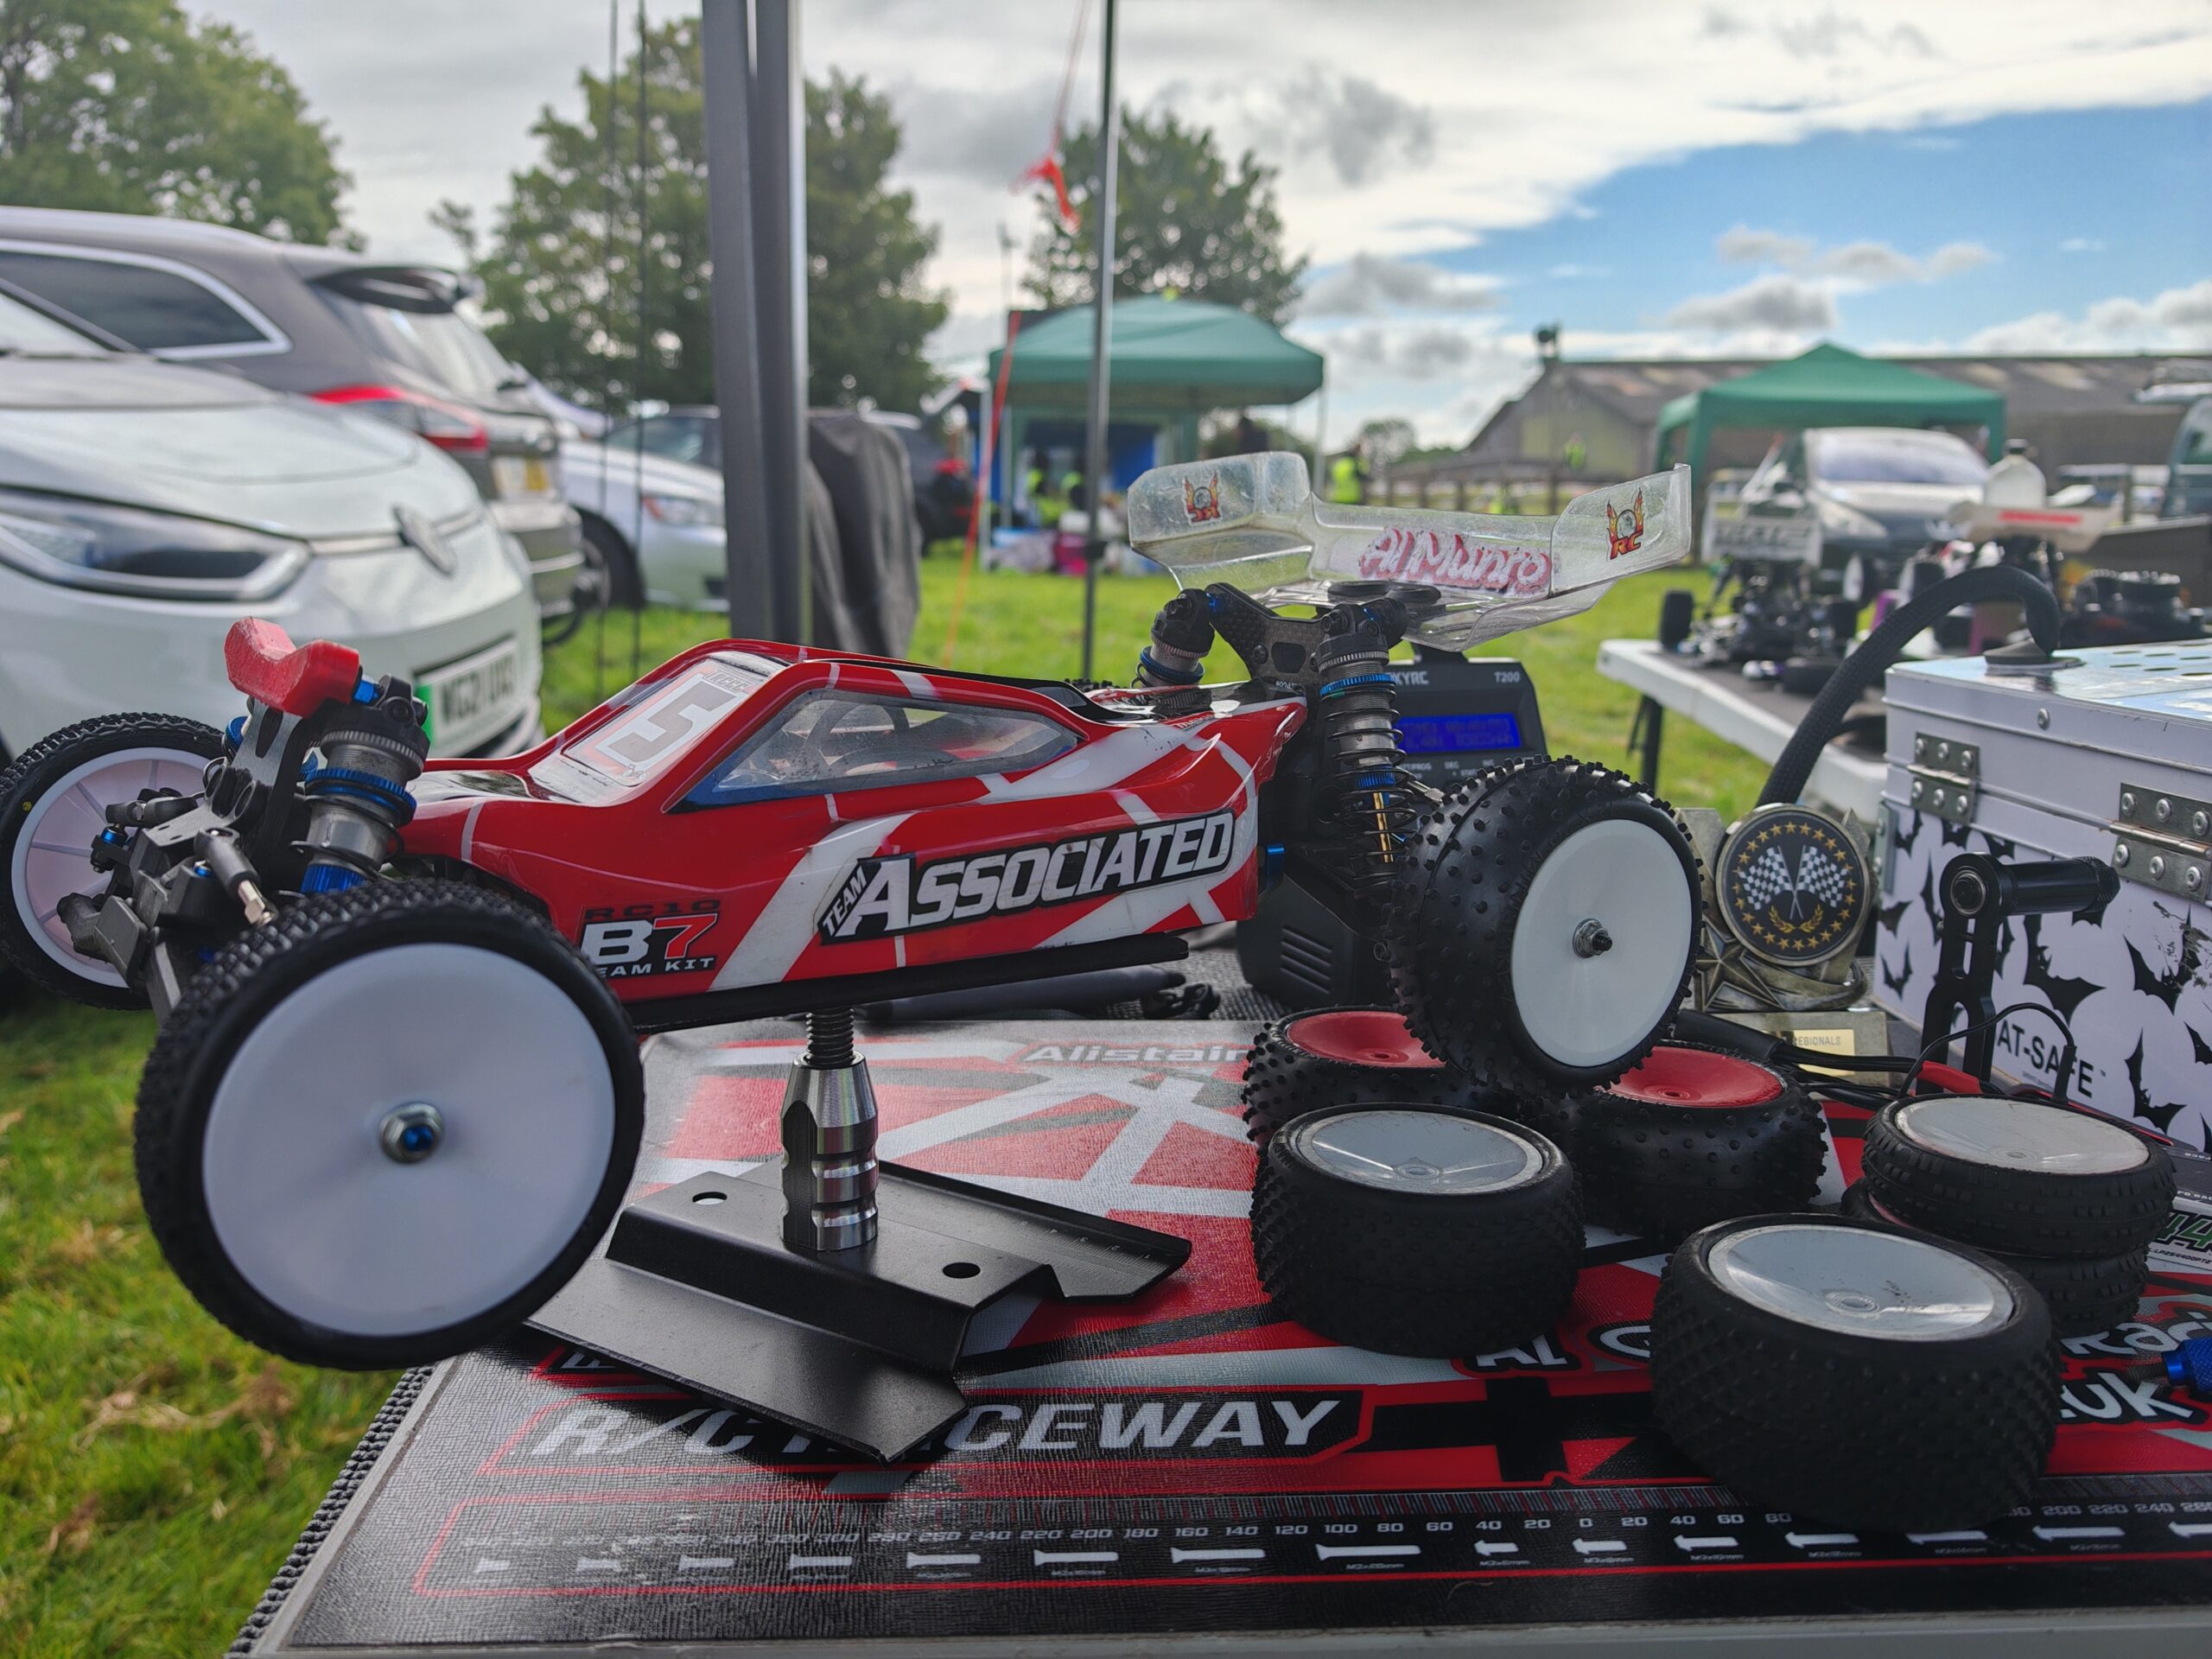
After a season and a half with the Schumacher LD2, I got to feeling that I wasn’t suited to it. I wasn’t the only one to feel that the LD2 has a very narrow performance window, and that unless you’re very experienced, and have masses of talent that can discern a very nuanced car, you can chase your tail finding pace. The best alternative available to me is the Associated RC10 B6.4d. After a rather annoying episode of repeated Top Link Turnbuckles failing (3 over the course of 11 laps at Tiverton), I’ve made the the jump to Associated. This is very exciting for me. I’ve only owned an Associated 10th Pan Car before, and never an AE Buggy, so I’m very revved up to get out there and see how this compares.
Kindly supplied by John at RC Octane for a great price, it has a reputation for being more forgiving to drive, easier to set up and crucially, more robust than …. (OK I won’t bang on about it).

- Tivvy 25/08/2024 & General Update

The day started well with being handed a little trophy for 10th place in this year’s 4wd regionals. I think I might concentrate on 4wd at Mendip over the winter, and 2wd at Cardiff. And maybe, that’ll stand me in good stead for a more concerted attack on next year’s championship.

Onto today’s meeting. Didn’t bother with Practice, it was always going to dry out between practice and the heats starting. I hadn’t quite got round to finding the best B7 config for Tivvy yet, so I left the Optima Mid at home so I could make today a Performance tweaker session. Yesterday, I shortened the rear wheelbase, cranked 4Deg of Toe-In on the back axle, which also took a little bit of rear track off at the same time. The first heat showed this more or less did what I wanted, making for a car that was more stable at the back on the off cambers and faster turns.
Qualifying – Round 1
Race 6 – 2wd
Pos Car Driver Result Best10 Best 1 1 Michael Halsey 13 / 323.08 24.40 23.73 2 4 Chris Law 12 / 301.05 24.72 24.29 3 5 Alistar Munro 12 / 309.82 25.45 24.64 4 8 Wayne James 12 / 319.08 25.63 24.48 5 2 Andy Nelson 12 / 321.13 25.75 24.82 6 6 Steven Hull 12 / 322.30 26.19 25.31 7 3 John Farringdon 11 / 306.51 27.31 24.89 8 7 Jamie Stringer 9 / 302.82 0.00 31.88 Before Heat 2, I felt the back was bottoming out a bit too much for comfort in the dip in the straight, making Turn 1 a bit random. So I changed out the 300wt shock oil for 350wt. Here’s how much difference it made…
Qualifying – Round 2
Race 6 – 2wd
Pos Car Driver Result Best10 Best 1 4 Chris Law 13 / 324.97 24.72 24.15 2 1 Michael Halsey 13 / 327.49 23.86 22.96 3 8 Wayne James 12 / 300.62 24.73 24.17 4 6 Steven Hull 12 / 302.63 24.80 23.93 5 2 Andy Nelson 12 / 308.05 25.12 23.65 6 5 Alistar Munro 12 / 309.20 25.13 23.81 7 3 John Farringdon 12 / 310.33 25.38 24.53 8 7 Jamie Stringer 10 / 315.04 31.50 29.92 So definitely net faster, take out the couple of annoying tangles, and that’s a good gain.
For Round 3, I raised the inboard front camber link mounts up for a bit more roll and turn in. Also upped the brake force to full on the ESC.
Qualifying – Round 3
Race 6 – 2wd
Pos Car Driver Result Best10 Best 1 1 Michael Halsey 13 / 305.75 23.33 22.61 2 4 Chris Law 13 / 323.75 24.53 23.89 3 2 Andy Nelson 12 / 303.20 24.41 23.42 4 3 John Farringdon 12 / 303.75 25.03 24.38 5 6 Steven Hull 12 / 310.63 25.38 24.90 6 5 Alistar Munro 12 / 319.68 24.97 23.79 7 8 Wayne James 12 / 321.60 25.85 24.28 8 7 Jamie Stringer 11 / 324.79 29.19 28.02 Which looks like a 10 seconds slower disaster, but that’s not the whole story.

The car was going like a stabbed rat, But at the start of Lap 8 (as you can clearly see) I caught a bump awkwardly at near top speed, sending the car cartwheeling down to Turn 1, and just as it got down to the catch fencing down there, it just caught another bump and bounced unluckily over the fence and down behind the bushes. Poo. But, not to worry, it did prove that much of what you read on the web about the B7 being fragile, is myth.
Round 4, no changes, just focus on a solid clean run.
Qualifying – Round 4
Race 6 – 2wd
Pos Car Driver Result Best10 Best 1 1 Michael Halsey 13 / 309.47 23.35 22.82 2 4 Chris Law 13 / 322.13 24.55 23.84 3 2 Andy Nelson 13 / 323.52 24.76 23.56 4 5 Alistar Munro 12 / 309.29 25.50 24.83 5 3 John Farringdon 12 / 313.67 25.58 24.62 6 6 Steven Hull 12 / 316.97 25.77 24.70 7 7 Jamie Stringer 11 / 313.28 28.12 25.31 8 8 Wayne James 9 / 266.46 0.00 25.04 Just before the Finals started, there was a short light shower. I bolted on a set of Silvers to the B6.4d because it looked for all the world like a wet race. But a bit of Sunshine meant was just a shade (geddit?) premature, and with a minute to go, I swapped back to the B7.

And good job I did. The Final was a very competitive affair. I made a good start and was trading jabs ith Andreus and Johnny F for a bit before settling into quite a nice 2nd with the car feeling stable and sharp. However, young Harry Porter seemed to have found a bucket full of pace, and pushed his way onto my tail. Full credit where it’s due, he bided his time until I made a wide exit on the off cambers at the top of the track and took his place neatly and fairly. From that point, I was quite happy to just keep a respectable pace home for 3rd.
Finals – Round 1
Race 5 – 2wd – C Final
Pos Car Driver Result Best10 Best 1 1 Andy Nelson 12 / 302.50 24.80 23.93 2 6 Harry Porter 12 / 303.31 24.76 24.28 3 3 Alistar Munro 12 / 307.24 25.28 24.57 4 4 John Farringdon 12 / 311.49 25.41 24.49 5 8 Barry Norris 12 / 320.02 25.78 24.92 6 7 Steven Hull 12 / 323.77 26.16 25.54 7 10 Jamie Stringer 11 / 309.09 27.55 25.38 8 9 Matt Martin 11 / 311.24 27.50 25.87 9 2 Andrius Zilevicius 10 / 315.84 31.58 28.04 10 5 Wayne James 3 / 101.07 0.00 32.25 Driver Alistar Munro Position 3 Result 12 / 307.24 Average 25.60 Best10 25.28 Best 24.57 Consec3 74.79 Lap Time 1 26.55 2 27.86 3 24.76 4 25.72 5 24.93 6 25.29 7 24.57 8 25.60 9 25.75 10 25.24 11 25.15 12 25.82 So eneded the day with my best round of the day, a clean drive with nice consistent lap times. The car’s best Tivvy setup is nearly there and there’s a trophy in the boot as a cherry on top.
- Some Happy Snaps from the Weekend at Tivvy
Me in my happy place, on the rostrum 🙂

Andy takes a tumble, I take a very wide line and give up a place to John Howe to stay out of trouble.
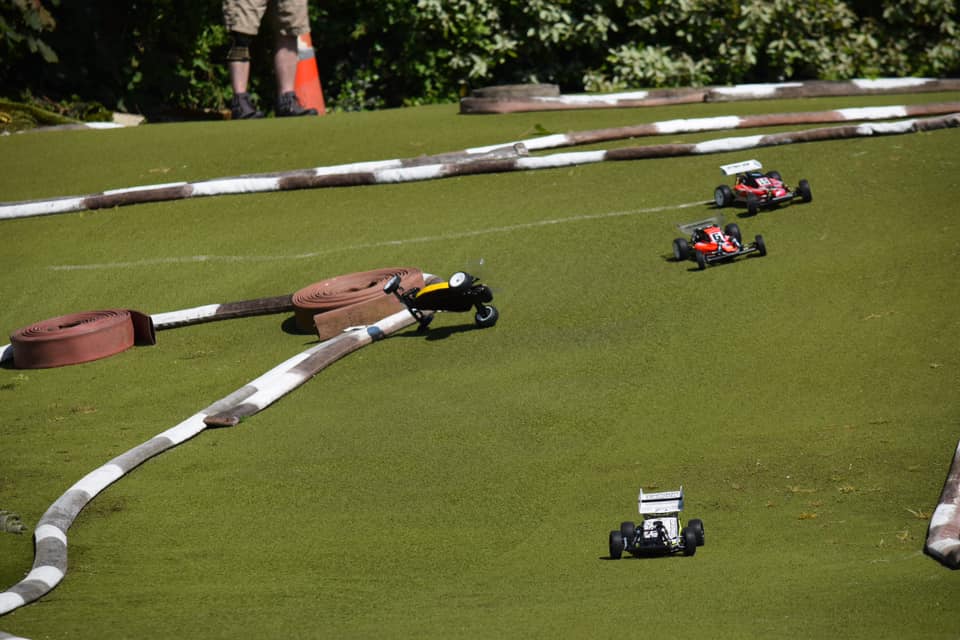
But by the bottom of the hill, I want that place back…badly!
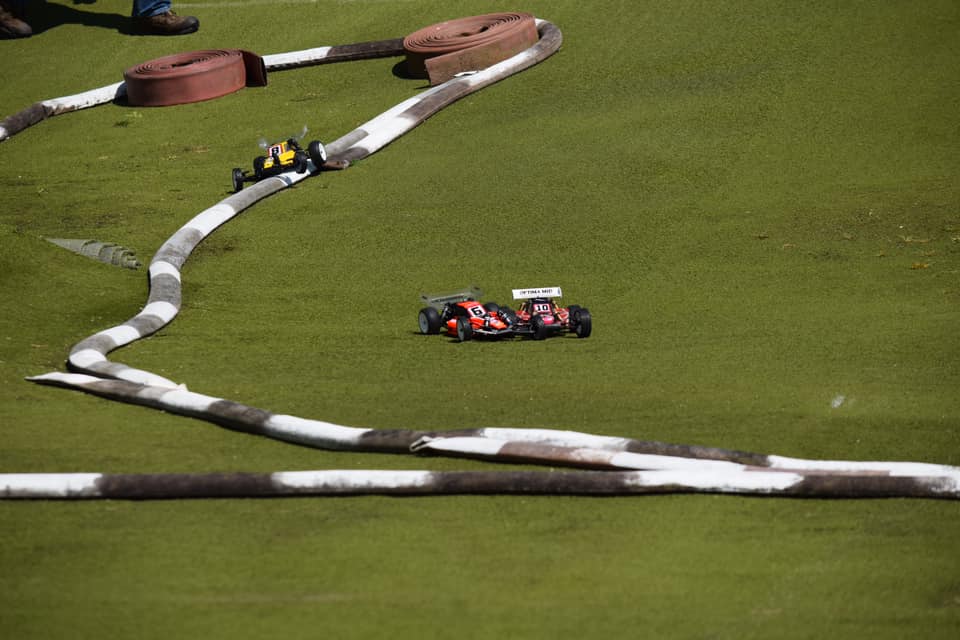
A moment later, John backs out of the tangle with the heavier car.
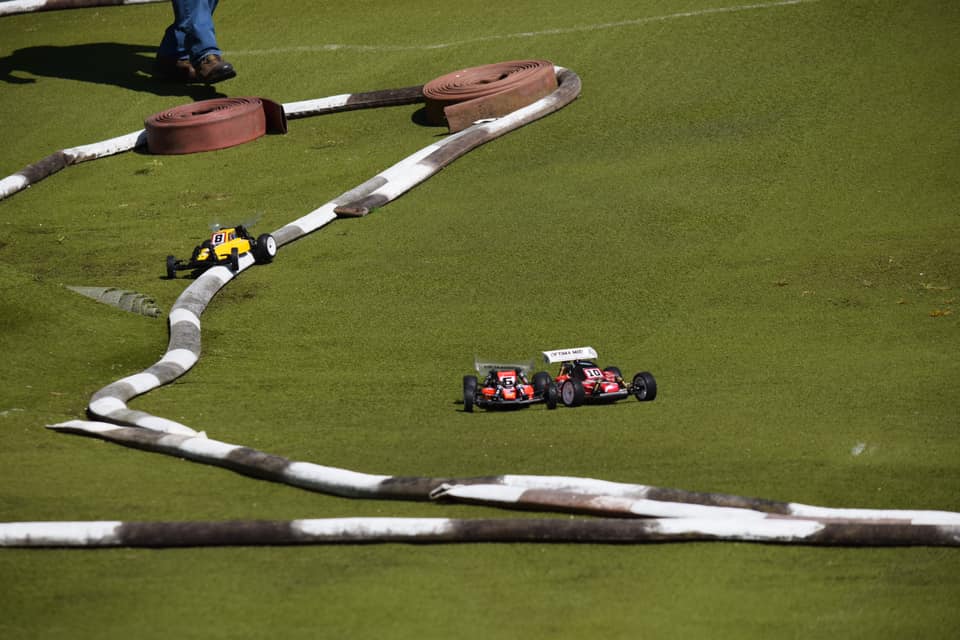
And that’s 8th Place from 10th on the grid. Lovely Jubbly!

And here’s a photo of Finchy and Farringdon’s Orbs…

- Mendip Summer Championship RD1 – 07/04/2024

A busy day today. Running the meeting as well as competing is always a little tricky.
A damp start meant I didn’t have tyres ready for the 1st heat. 10 rather slow laps with no grip at the back. Time to glue up some Ballistics.
Qualifying – Round 1
Race 2 – 2wd Buggy
Driver Alistair Munro Position 5 Result 10 / 316.33 Average 31.63 Best10 31.63 Best 27.20 Consec3 87.81 Lap Time 1 27.20 2 32.52 3 34.12 4 30.98 5 29.33 6 30.67 7 43.70 8 28.73 9 28.42 10 30.66 Quali 2 was better with the right tyres. Fewer mistakes but still to many.
Qualifying – Round 2
Race 2 – 2wd Buggy
Driver Alistair Munro Position 4 Result 12 / 327.00 Average 27.25 Best10 26.05 Best 23.71 Consec3 73.97 Lap Time 1 30.52 2 26.93 3 25.91 4 26.13 5 32.22 6 24.94 7 24.84 8 25.42 9 23.71 10 26.30 11 25.82 12 34.26 The car wasn’t far off, steering wasn’t quite sharp enough, and a quick look at the ride heights showed the front was a little lower than the rear so a couple of mill added to even it up…
With the track starting to dry, but only in places, I decided to stick with the Ballistics and just manage any grabby moments.
Qualifying – Round 3
Race 2 – 2wd Buggy
Driver Alistair Munro Position 5 Result 12 / 310.19 Average 25.84 Best10 24.19 Best 22.90 Consec3 69.87 Lap Time 1 40.42 2 24.83 3 23.49 4 25.43 5 27.86 6 24.07 7 23.99 8 26.54 9 23.69 10 23.34 11 23.63 12 22.90 3 felt better, but was buggered by 2 bad mistakes on the first lap, and some silly scrapping on the 5th and 8th lap.
A Clean 4th round saved the day from catastrophy. If i’d have found that pace earlier in the day, an A Final would have been on the cards. Coulda, woulda, shoulda, I know. But nevertheless, Encouraging…
Qualifying – Round 4
Round By Round. Best 2 Rounds to Count
2wd Buggy
Pos Name Best Tie Break Points R1 R2 R3 R4 1 Stuart Ball 15 / 321.70 0 0 2 0 2 2 Keith Halsey 14 / 302.49 14 / 302.98 2 23 3 2 0 3 Paul Rose 14 / 303.33 14 / 319.11 2 2 0 3 3 4 Dane Winterson 14 / 317.44 7 3 5 4 7 5 Michael Evely 14 / 313.98 8 12 4 21 4 6 Chris Law 14 / 324.49 10 5 8 5 5 7 Cam Pollinger 13 / 300.70 12 8 6 6 6 8 Ian Russell 13 / 316.81 16 9 7 9 9 9 Andy Leach 12 / 302.54 17 6 22 11 12 10 Kevin Greenway 13 / 307.77 13 / 307.77 17 11 10 7 10 11 James Wherlock 12 / 301.77 11 / 308.39 17 7 12 10 13 12 Richard Evely 13 / 314.96 17 17 9 8 23 13 Jamie Stringer 12 / 311.89 19 4 15 15 20 14 Alistair Munro 13 / 315.94 21 18 13 14 8 15 Ian Brooking 12 / 302.26 21 10 11 12 11 16 Terry Leach 12 / 308.44 12 / 308.44 27 14 17 13 14 17 Ross Everill 12 / 319.49 10 / 300.17 27 13 14 17 15 18 Marc Biddis 11 / 303.25 32 16 18 16 16 19 Doug Moreton 11 / 308.30 33 23 16 18 17 20 Matt Martin 11 / 325.44 34 15 20 22 19 21 Alfie Ball 11 / 308.70 37 19 19 19 18 22 Joe Ball 9 / 317.17 40 20 21 20 21 6th in the B, and I went with Proline Pyramids on the back because there were more dry areas than wet at this point.
The first lap carnage meant I had to doggedly claw my way back and scrap for my life to get to 4th. But the handling seemed to be going my way.
Finals – Round 1
Race 2 – 2wd Buggy – B Final
Driver Alistair Munro Position 4 Result 13 / 316.06 Average 24.31 Best10 23.62 Best 22.38 Consec3 68.18 Lap Time 1 27.39 2 25.51 3 25.60 4 23.49 5 22.38 6 22.89 7 22.91 8 22.83 9 23.64 10 23.62 11 26.84 12 23.43 13 25.53 Finals – Round 1
Race 2 – 2wd Buggy – B Final
Pos Car Driver Result Best10 Best 1 2 Kevin Greenway 13 / 300.55 22.75 21.45 2 1 Andy Leach 13 / 303.80 22.97 21.88 3 4 Richard Evely 13 / 310.37 22.89 21.59 4 6 Alistair Munro 13 / 316.06 23.62 22.38 5 3 James Wherlock 13 / 321.16 23.41 22.51 6 5 Jamie Stringer 12 / 302.95 24.47 22.86 7 7 Ian Brooking 12 / 316.33 24.42 22.35 Managed to score a win in Round 3, I think it ranks as one of my best drives ever. The car was just hooked up and everybody else was too busy tangling to worry me. Very chuffed with the consistancy as well as half decent pace.
Finals – Round 2
Race 2 – 2wd Buggy – B Final
Driver Alistair Munro Position 1 Result 14 / 318.69 Average 22.76 Best10 22.27 Best 21.54 Consec3 66.59 Lap Time 1 25.54 2 24.68 3 22.07 4 22.44 5 22.29 6 21.98 7 22.38 8 22.23 9 22.45 10 22.71 11 21.54 12 22.66 13 22.85 14 22.87 Finals – Round 2
Race 2 – 2wd Buggy – B Final
Pos Car Driver Result Best10 Best 1 6 Alistair Munro 14 / 318.69 22.27 21.54 2 1 Andy Leach 13 / 303.22 22.73 22.10 3 4 Richard Evely 13 / 309.34 22.93 21.17 4 7 Ian Brooking 13 / 326.45 24.01 22.63 5 2 Kevin Greenway 12 / 273.42 22.30 21.29 6 3 James Wherlock 12 / 300.58 24.49 22.68 7 5 Jamie Stringer 12 / 318.09 24.98 23.29 The last final wasn’t my finest hour. The car was going like a steam train, and Andy Leach was doing a good job in 2nd, but klipped him twice trying to make moves that now the dust has settled, I admit weren’t really on. I pushed really hard to catch him, but I wasn’t going to make it. Then, with horrible cruelty, he clipped a rail with two corners to go and rolled it to allow me through. Sorry Andy, I owe you a beer.
2wd Buggy – B Final
Pos Car Name Tie Break Points R1 R2 R3 1 2 Kevin Greenway 2 1 5 1 2 6 Alistair Munro 3 4 1 2 3 1 Andy Leach 4 2 2 3 4 4 Richard Evely 6 3 3 7 5 3 James Wherlock 9 5 6 4 6 7 Ian Brooking 9 7 4 5 7 5 Jamie Stringer 12 6 7 6 I’ll take that, a pretty good start to the season.
Summer Championship 2024
Best 6 Rounds To Count. Tie Break: Countback
2wd Buggy
Pos Name Ability Points R1 R2 R3 R4 R5 R6 R7 R8 R9 R10 =1 Stuart Ball 99% 100 100 0 0 0 0 0 0 0 0 0 =1 Keith Halsey 99% 100 100 0 0 0 0 0 0 0 0 0 3 Michael Evely 97% 98 98 0 0 0 0 0 0 0 0 0 4 Paul Rose 96% 97 97 0 0 0 0 0 0 0 0 0 5 Dane Winterson 95% 96 96 0 0 0 0 0 0 0 0 0 6 Ian Russell 94% 95 95 0 0 0 0 0 0 0 0 0 7 Chris Law 93% 94 94 0 0 0 0 0 0 0 0 0 8 Cam Pollinger 92% 93 93 0 0 0 0 0 0 0 0 0 9 Kevin Greenway 91% 92 92 0 0 0 0 0 0 0 0 0 10 Alistair Munro 90% 91 91 0 0 0 0 0 0 0 0 0 11 Andy Leach 89% 90 90 0 0 0 0 0 0 0 0 0 12 Richard Evely 88% 89 89 0 0 0 0 0 0 0 0 0 13 James Wherlock 87% 88 88 0 0 0 0 0 0 0 0 0 14 Ian Brooking 86% 87 87 0 0 0 0 0 0 0 0 0 15 Jamie Stringer 85% 86 86 0 0 0 0 0 0 0 0 0 16 Terry Leach 84% 85 85 0 0 0 0 0 0 0 0 0 17 Marc Biddis 83% 84 84 0 0 0 0 0 0 0 0 0 18 Doug Moreton 82% 83 83 0 0 0 0 0 0 0 0 0 19 Matt Martin 81% 82 82 0 0 0 0 0 0 0 0 0 20 Ross Everill 80% 81 81 0 0 0 0 0 0 0 0 0 21 Alfie Ball 79% 80 80 0 0 0 0 0 0 0 0 0 22 Joe Ball 78% 79 79 0 0 0 0 0 0 0 0 0 
- COBRA Clubbie – 31/03/2024
Bit of an end of an Era today. With a B7 on order with Mr.Finch , this will be the last time I’ll run the B6.4d on Carpet. It’s not going in the bin or being sold. But it is going into Semi-Retirement as a Wet car. This will allow my to permanently fit the layback transmission, rear weights, short wheelbase and a soft suspension setup with plenty of roll.

The B6.4d retiring from Carpet Racing The first heat was encouraging. Despite getting into a bunch of tangles, the new Fusion Slim front tyres finally gave the front end a predictable sharpness I’ve been looking for. Early fettling in practice showed up the sensor cable wasn’t plugged into the ESC very well. Re-plugging it gave the push and punch that’s been missing.
Lap Stats
Fast Lap:
16.043Avg. Lap:
18.834Avg. Top 5:
16.848Avg. Top 10:
17.225Avg. Top 15:
17.576Top 2 Consec.:
49.823Top 3 Consec.:
49.823Std. Deviation:
2.604Consistency:
86.174%Lap Times
# Time Pace Pos 1 18.004 20/6:00.080 2nd 2 18.244 20/6:02.480 2nd 3 18.362 20/6:04.067 2nd 4 27.265 18/6:08.438 6th 5 20.896 18/6:09.976 6th 6 17.095 19/6:19.576 4th 7 17.32 19/6:12.362 4th 8 22.946 18/6:00.297 4th 9 19.593 19/6:19.419 4th 10 17.458 19/6:14.648 4th 11 22.353 19/6:19.199 4th 12 17.357 19/6:15.081 4th 13 17.835 19/6:12.295 4th 14 18.289 19/6:10.523 4th 15 16.043 19/6:06.143 3rd 16 16.543 19/6:02.904 3rd 17 17.237 19/6:00.821 3rd 18 18.334 19/6:00.128 2nd 19 17.36 20/6:17.404 2nd 20 18.152 20/6:16.686 2nd Quali 2 was even scrappier, just didn’t have my head in the game…
Lap Stats
Fast Lap:
16.674Avg. Lap:
19.209Avg. Top 5:
16.989Avg. Top 10:
17.301Avg. Top 15:
17.940Top 2 Consec.:
51.079Top 3 Consec.:
51.079Std. Deviation:
2.694Consistency:
85.974%Lap Times
# Time Pace Pos 1 17.745 21/6:12.645 2nd 2 23.863 18/6:14.472 5th 3 19.605 18/6:07.278 4th 4 20.786 18/6:08.996 4th 5 19.536 18/6:05.526 3rd 6 18.006 19/6:18.547 3rd 7 18.161 19/6:13.763 3rd 8 25.545 18/6:07.306 4th 9 17.616 18/6:01.726 4th 10 16.831 19/6:15.619 4th 11 17.767 19/6:12.160 4th 12 17.162 19/6:08.320 4th 13 23.818 19/6:14.798 4th 14 17.548 19/6:11.842 4th 15 17.258 19/6:08.913 4th 16 17.383 19/6:06.498 4th 17 16.674 19/6:03.575 4th 18 17.022 19/6:01.344 4th 19 22.654 19/6:04.980 4th I had a word with myself before Q3, and I found some focus. An almost clean run apart from one little pipe clip that just went a bit wrong on the penultimate lap.. But none-the-less, a lovely trade in over takes with Elliott Capper.
Lap Stats
Fast Lap:
16.889Avg. Lap:
17.980Avg. Top 5:
17.088Avg. Top 10:
17.308Avg. Top 15:
17.510Top 2 Consec.:
51.902Top 3 Consec.:
51.902Std. Deviation:
1.098Consistency:
93.893%Lap Times
# Time Pace Pos 1 17.362 21/6:04.602 4th 2 17.596 21/6:07.059 3rd 3 16.944 21/6:03.314 2nd 4 19.379 21/6:14.225 3rd 5 18.115 21/6:15.463 3rd 6 18.286 21/6:16.887 2nd 7 17.848 21/6:16.590 2nd 8 18.084 21/6:16.987 3rd 9 17.48 21/6:15.886 2nd 10 16.937 21/6:13.865 2nd 11 18.461 21/6:15.121 3rd 12 16.889 21/6:13.417 3rd 13 17.83 21/6:13.495 3rd 14 17.884 21/6:13.643 3rd 15 17.701 21/6:13.514 3rd 16 17.327 21/6:12.911 3rd 17 17.344 21/6:12.400 3rd 18 17.498 21/6:12.126 3rd 19 17.926 21/6:12.353 3rd 20 22.147 21/6:16.990 3rd 21 18.544 21/6:17.582 3rd Ultimately, I think if I’d been as on top of the car as I was in Q3 in Q1&2, I’d have scraped into the B.
But C final it was, and despite a god start from second, I fluffed the first lap and ended up 7th and last after losing 9 seconds to stupid mistakes. I managed to claw a lot of that back and get up to 4th with some respectable laps, only to again get a bit careless. In last for the second time, it seemed I didn’t have the grip for pushing on the tyres 4th Session. I settled down to a pace about 1.5 seconds off my best. During the 3 penultimate laps i’d plodded up 3rd and 2nd place, just over the loop, it happens the times showed me in 4th at that point. The last lap could have, should have been a 2nd place. but i tripped up just before the loop, and the marshal put me back on after. Drat! Of course I’m hoisted by my own petard, a cleaner run would have yeided more. Fuck it, it’s just a clubbie.
Lap Stats
Fast Lap:
16.875Avg. Lap:
19.679Avg. Top 5:
17.073Avg. Top 10:
17.305Avg. Top 15:
17.610Top 2 Consec.:
52.188Top 3 Consec.:
52.188Std. Deviation:
5.606Consistency:
71.514%Lap Times
# Time Pace Pos 1 25.341 15/6:20.109 7th 2 16.875 18/6:19.940 6th 3 17.642 19/6:19.098 5th 4 18.206 19/6:10.802 4th 5 28.305 17/6:01.653 7th 6 19.365 18/6:17.201 7th 7 17.1 18/6:07.286 7th 8 17.427 18/6:00.586 7th 9 17.661 19/6:15.612 6th 10 17.77 19/6:11.814 5th 11 17.293 19/6:07.882 5th 12 18.713 19/6:06.855 5th 13 17.423 19/6:04.099 4th 14 21.149 19/6:06.794 5th 15 16.931 19/6:03.787 5th 16 17.999 19/6:02.425 4th 17 17.535 19/6:00.703 4th 18 18.401 19/6:00.088 4th 19 17.167 20/6:17.161 4th 20 40.943 19/6:19.283 4th 
- COBRA Club/Vintage Day 21/01/2024
I haven’t got around to writing up the last round of SWORD yet. Suffice it to say that I’d kind of lost my way with the b6.4d. I’d been playing around with some settings and confusing myself a bit. Not to mention, Driving the b74.2d, or the “Turbo Nutter Bastard” as I’m beginning to call it, allows you to drive it so aggressively that going back to a 2wd is a harsh contrast.
Anyway, I went closer to a kit setup when I prepped it yesterday. But with 400wt front and 375wt shock oil in the rear. 12mm ride height all round, Yellow Springs, and 1.6 & 1.7 Two Hole Pistons in front and rear respectively. There were some hardly used Proline Prisms in the Hauler, and these seem to work quite well with the Fuzz Bites on the front. So stiffer, more pack, low and high roll centers.
The Mid didn’t need much fuss, lowered the ride height, put the transponder in. Jubbly!
Optima Mid
Practice was pretty predictable, I seem to have mislaid the fittings for the rear roll bar, so I had to stand on the brakes at the end of the straight, or it rolled too much. Aside from that, it just needed pointing at the apexes and it did it’s thing.
Fast Lap:
21.292
Avg. Lap:
23.680
Avg. Top 5:
21.931
Avg. Top 10:
22.648
Avg. Top 15:
Top 2 Consec.:
65.243
Top 3 Consec.:
65.243
Std. Deviation:
2.154
Consistency:
90.905%
Lap Times
# Time Pace Pos 1 22.845 14/5:19.830 4th 2 24.223 13/5:05.942 6th 3 28.246 12/5:01.256 7th 4 23.207 13/5:20.193 6th 5 28.038 12/5:03.742 7th 6 25.074 12/5:03.266 7th 7 22.662 13/5:23.691 6th 8 22.724 13/5:20.156 6th 9 22.187 13/5:16.631 6th 10 21.764 13/5:13.261 6th 11 21.292 13/5:09.946 6th 12 23.829 13/5:09.932 6th 13 21.751 13/5:07.842 6th The First Round had two rather obvious cock ups, but still managed >90% consistency. Good enough as I’d never driven the thing on Carpet before.
Round 2 started well, the timing said I went from 6th to 2nd. But…
Fast Lap:
21.083Avg. Lap:
21.083Avg. Top 5:
Avg. Top 10:
Avg. Top 15:
Top 2 Consec.:
Top 3 Consec.:
Std. Deviation:
Consistency:
100.000%Lap Times
# Time Pace Pos 1 21.083 15/5:16.245 2nd 
Oops.
Ah well, not an expensive breakage, and I proved there is potential there.
Associated B6.4d
Practice was a relief. It seems like I’ve got back on track (pun sort of intended, soz) with the config. As I found in Round 1, Something needed warming up. Not much, I don’t know whether it was tyres, diff, slipper, shocks, motor or a combination of these. But it just got better throughout the race, more consistent and predictable as the laps clocked up. I dropped a couple of places and ended up with a 14 that felt like it should have been quicker. But the consistency was >90% so I’ll take that.
Lap Times
# Time Pace Pos 1 23.831 13/5:09.803 7th 2 20.547 14/5:10.646 6th 3 26.079 13/5:05.314 6th 4 24.318 13/5:08.019 6th 5 20.15 14/5:21.790 5th 6 20.833 14/5:16.769 5th 7 21.912 14/5:15.340 5th 8 21.741 14/5:13.969 4th 9 22.606 14/5:14.249 6th 10 19.777 14/5:10.512 4th 11 19.693 14/5:07.347 4th 12 23.182 14/5:08.781 5th 13 20.153 14/5:06.731 5th 14 22.299 14/5:07.121 5th Round 1 Round 2 was a case of finding the pace but lost the consistency on two dumbass arguments with corner markers. But a 15 was as faster than I’ve gone all winter by some margin, so chuffed. Without the mistakes on lap 6 and 12, I’d be in the 16s. Exactly the reason i set my consistency target at 90% or higher.
Lap Times
# Time Pace Pos 1 21.505 14/5:01.070 4th 2 20.353 15/5:13.935 4th 3 20.278 15/5:10.680 4th 4 22.39 15/5:16.973 4th 5 19.057 15/5:10.749 4th 6 25.058 15/5:21.603 5th 7 19.531 15/5:17.511 5th 8 19.54 15/5:14.460 4th 9 18.774 15/5:10.810 4th 10 19.939 15/5:09.638 4th 11 19.39 15/5:07.930 4th 12 27.706 15/5:16.901 4th 13 20.646 15/5:16.347 5th 14 18.935 15/5:14.038 5th 15 19.134 15/5:12.236 4th The Third Round was slightly less pacy but the consistency was back over 92% again, a nice neat drive.
Lap Times
# Time Pace Pos 1 20.916 15/5:13.740 4th 2 20.058 15/5:07.305 4th 3 19.999 15/5:04.865 4th 4 21.38 15/5:08.824 5th 5 19.258 15/5:04.833 2nd 6 20.138 15/5:04.373 2nd 7 20.254 15/5:04.292 2nd 8 25.443 15/5:13.961 2nd 9 23.506 15/5:18.253 4th 10 20.421 15/5:17.060 3rd 11 20.915 15/5:16.756 4th 12 19.722 15/5:15.013 4th 13 22.029 15/5:16.199 4th 14 19.508 15/5:14.515 4th 15 21.846 15/5:15.393 4th Round 3 Round 4 and I’d done my quali work. Slipped back down to a 14 because of scrapping and steering round trouble.
Made the C Final Mid Pack, which is much more like it. Thankfully, there were two rounds of finals. I say thankfully because I drove like an incompetent tit in the first final. Best to skip forward to the second final.
Very chuffed indeed with the Second final. Didn’t pussy out on the start, 6th to 3rd on the first lap and settled into a nice groove as the car warmed up. Clipped a Corner Marker out of a switchback on Lap 5 which opened the door for Fran Bravery to pass. James Harris Spent the next 8 or 9 laps trying to give me heart failure, but eventually both he and Fran made mistakes that cost them both, and rewarded my re found consistency with a 3rd place. Only 6 seconds off a 16, >95% consistency, little fist pump as I stepped off the rostrum.
The rear wear pattern on the Prisms tells the story of my day, it looks like I’ve found the rear config I’ve been looking for with the B6. Much more wear on the inside to center line without the car diffing out or oversteering under braking. Looks like 2 Deg of camber is about right.


- Avid Trident Slipper Clutch
- Avid -1 C Clamp